SEDA Creditor Registry Installation Guide
In this document are explained the installation procedures required to install this package successfully in Temenos Transact. This document covers the release mechanism of the package.
System Requirements
The following are the pre-requisites for installing the package:
- JDK 21.
- Temenos Transact area.
Contents of the Package
The pack contains the following ITSDCR_CreditorRegistryIncoming components.
- XSL folder:
- ClearingDirectoryFormOfs.
- FormOfsMessage.
- FormOfsUpdateParameterTable.
- UserCredentials.
Steps for Installing the Package
The following steps are required to install the package.
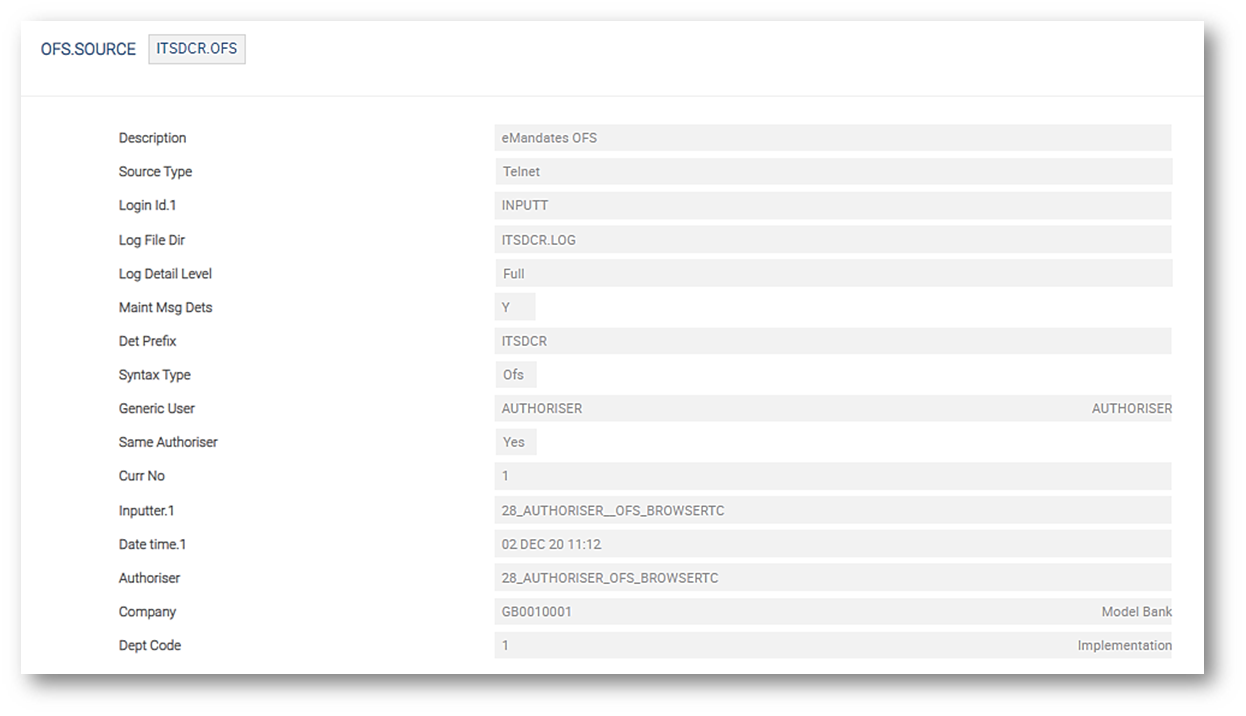
- Configure the ITSDCR.OFS record in the OFS.SOURCE application as per below.
- Set the JAVA_HOME variable in the start.cmd file.
- Make sure the OFS.SOURCE is also available, otherwise create an OFS source, as ITSDCR.OFS.
Specific queue names to be created in the standalone XML file for the generation of messages in queues.
<jms-queue name="t24ITSDCROFSQueue" entries="queue/t24ITSDCROFSQueue java:jboss/exported/jms/queue/t24ITSDCROFSQueue"/>
<jms-queue name="t24ITSDCROFSReplyQueue" entries="queue/t24ITSDCROFSReplyQueue java:jboss/exported/jms/queue/t24ITSDCROFSReplyQueue"/>

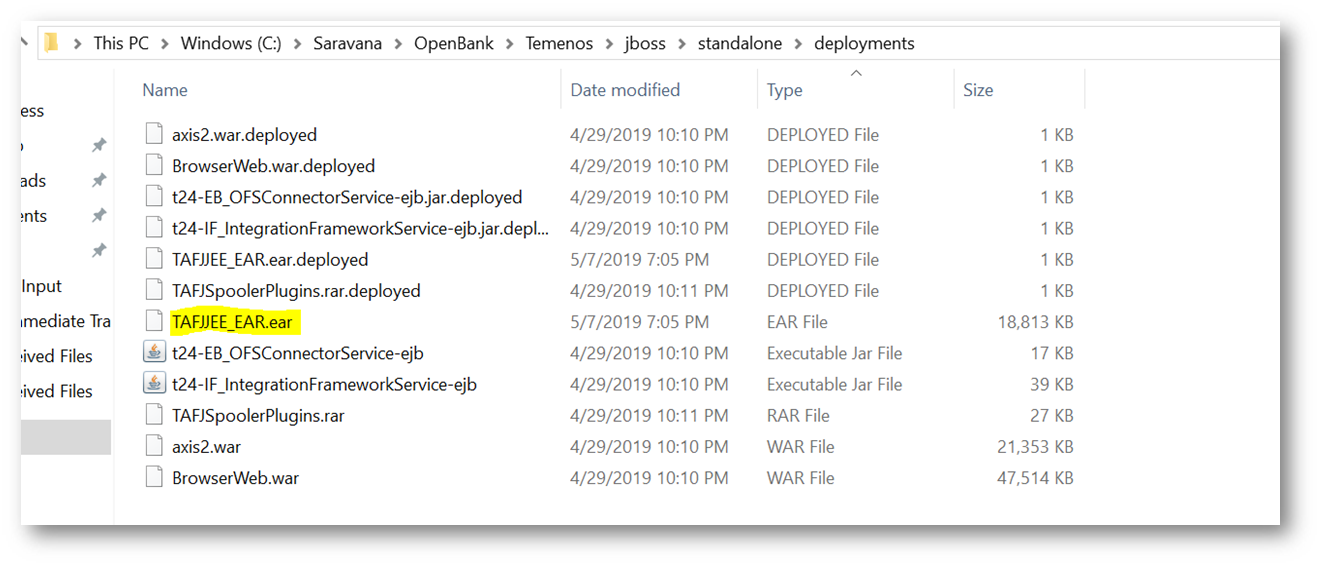
- Edit the TAFJEE_EAR.ear as displayed below.
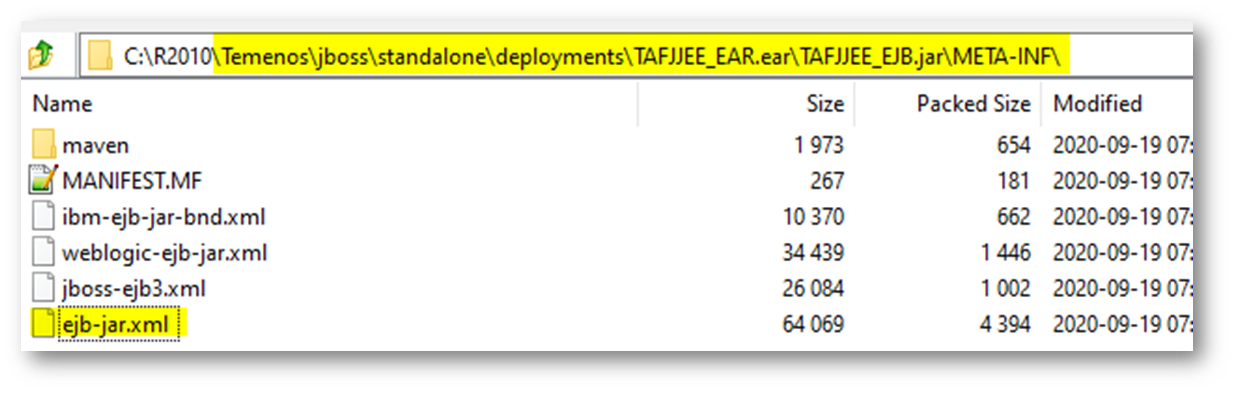
- Go to the path displayed below to update the OFS source in the TAFJEE_EJB.JAR.
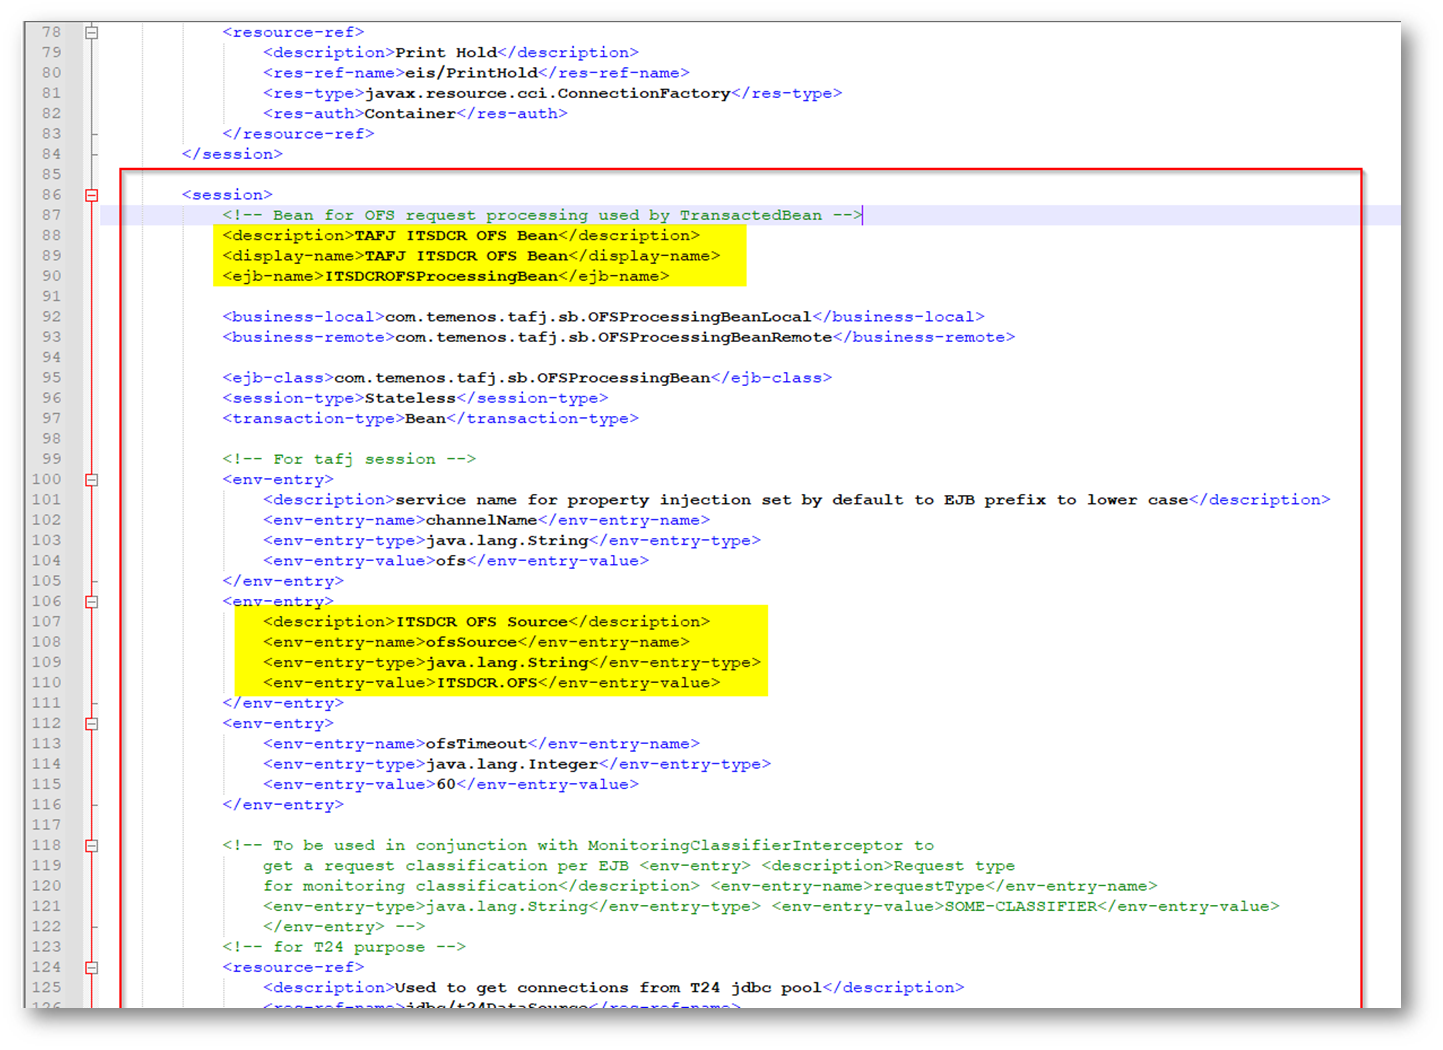
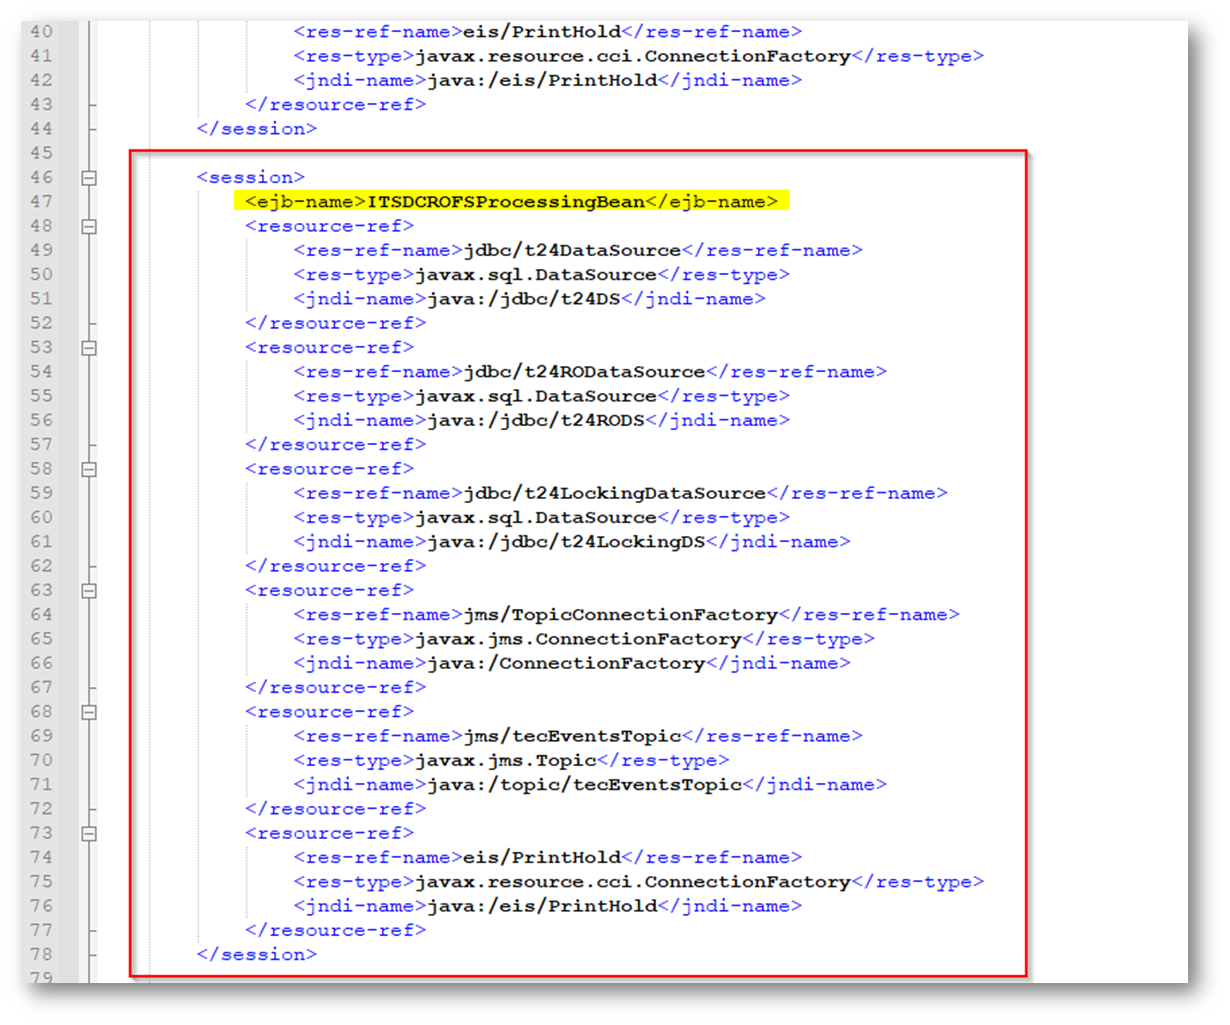
- Copy and paste the existing <session> tag and amend the highlighted lines below in the ejb.jar.xml file.
- Copy and paste the existing <session> tag and amend the highlighted lines below in the jboss-ejb3.xml file.
- Edit the details below in the TAFJEE_MDB.jar.

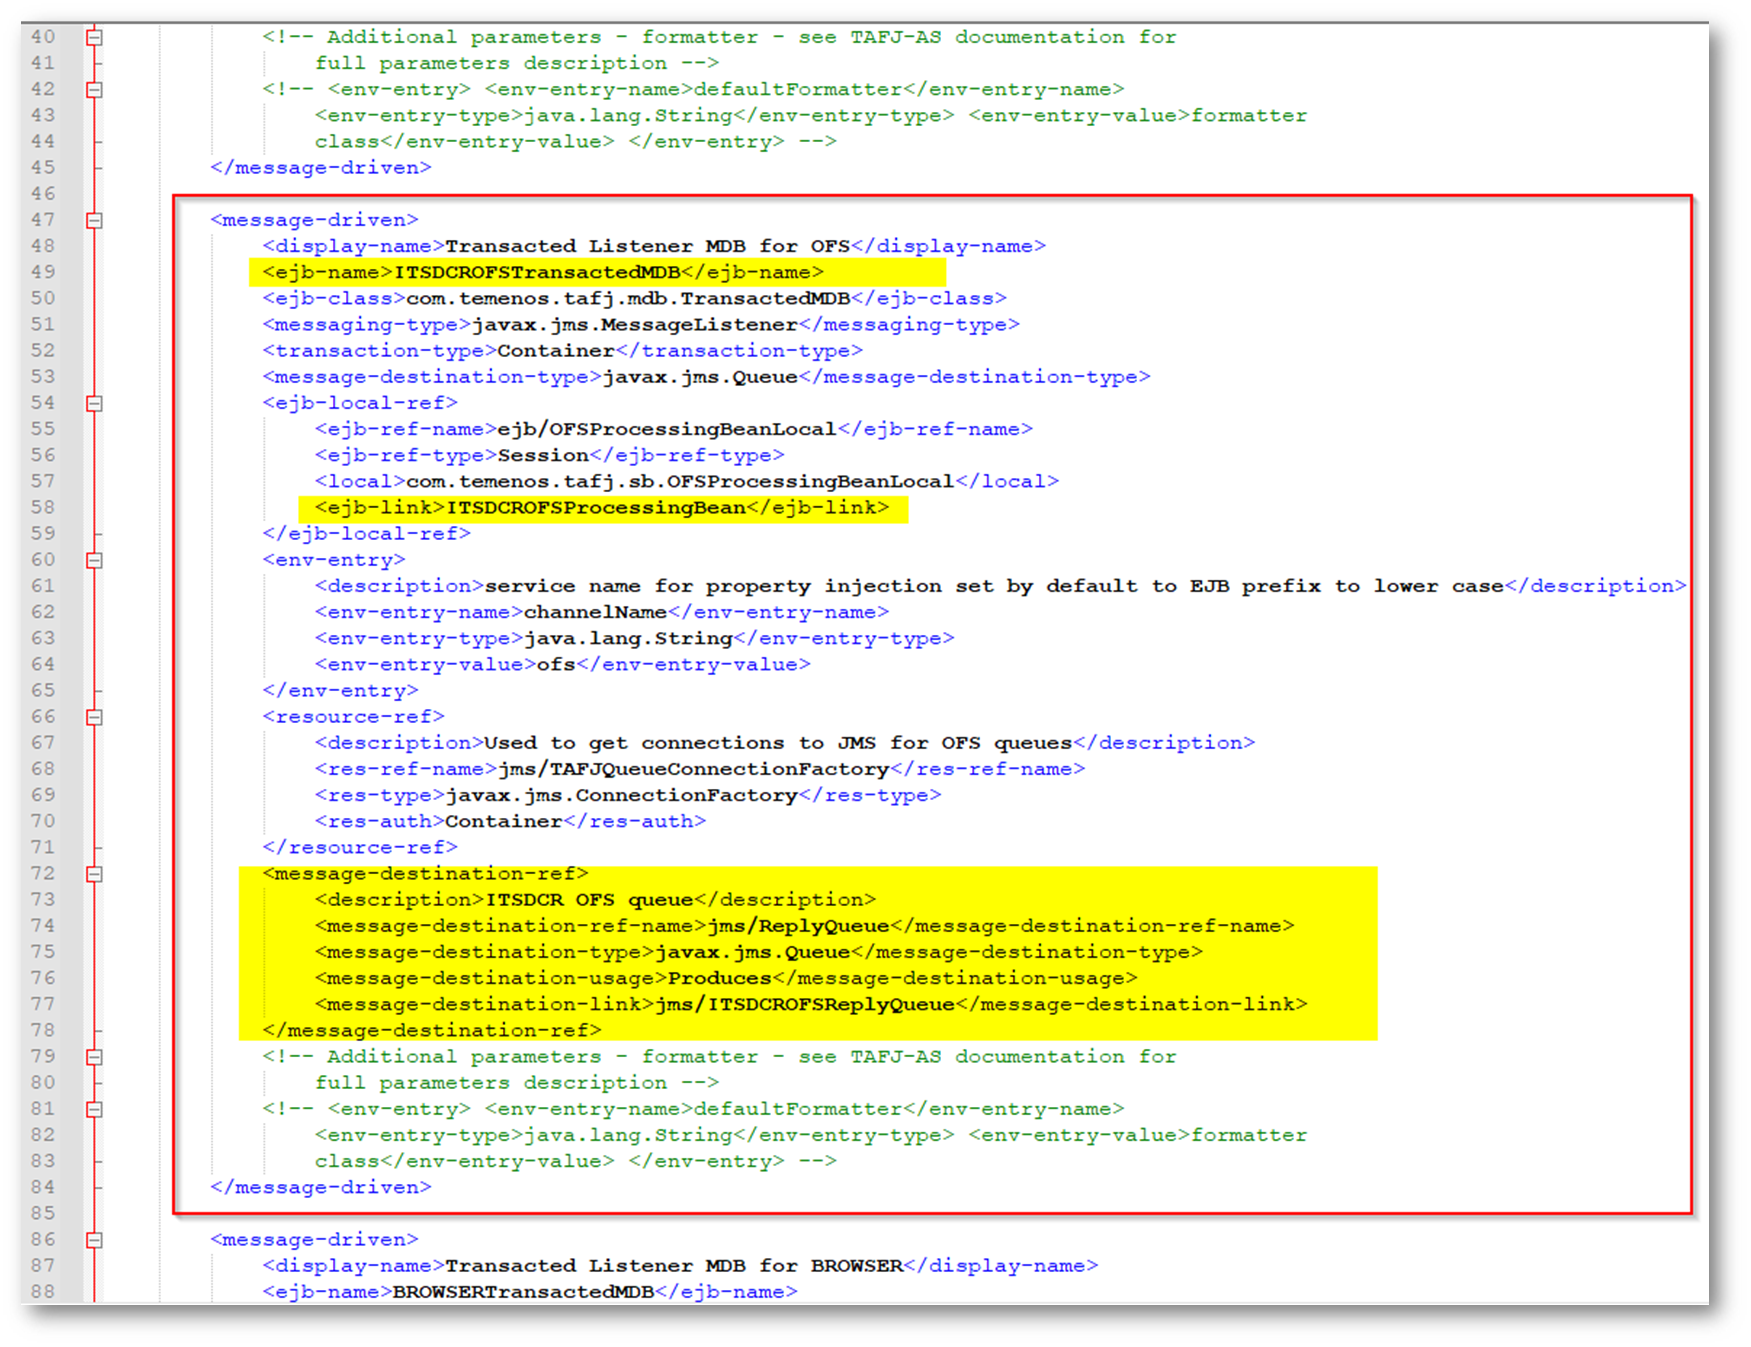
- Copy and paste the <message-drive> tag and amend the highlighted lines below in the jboss-ejb3.xml file.

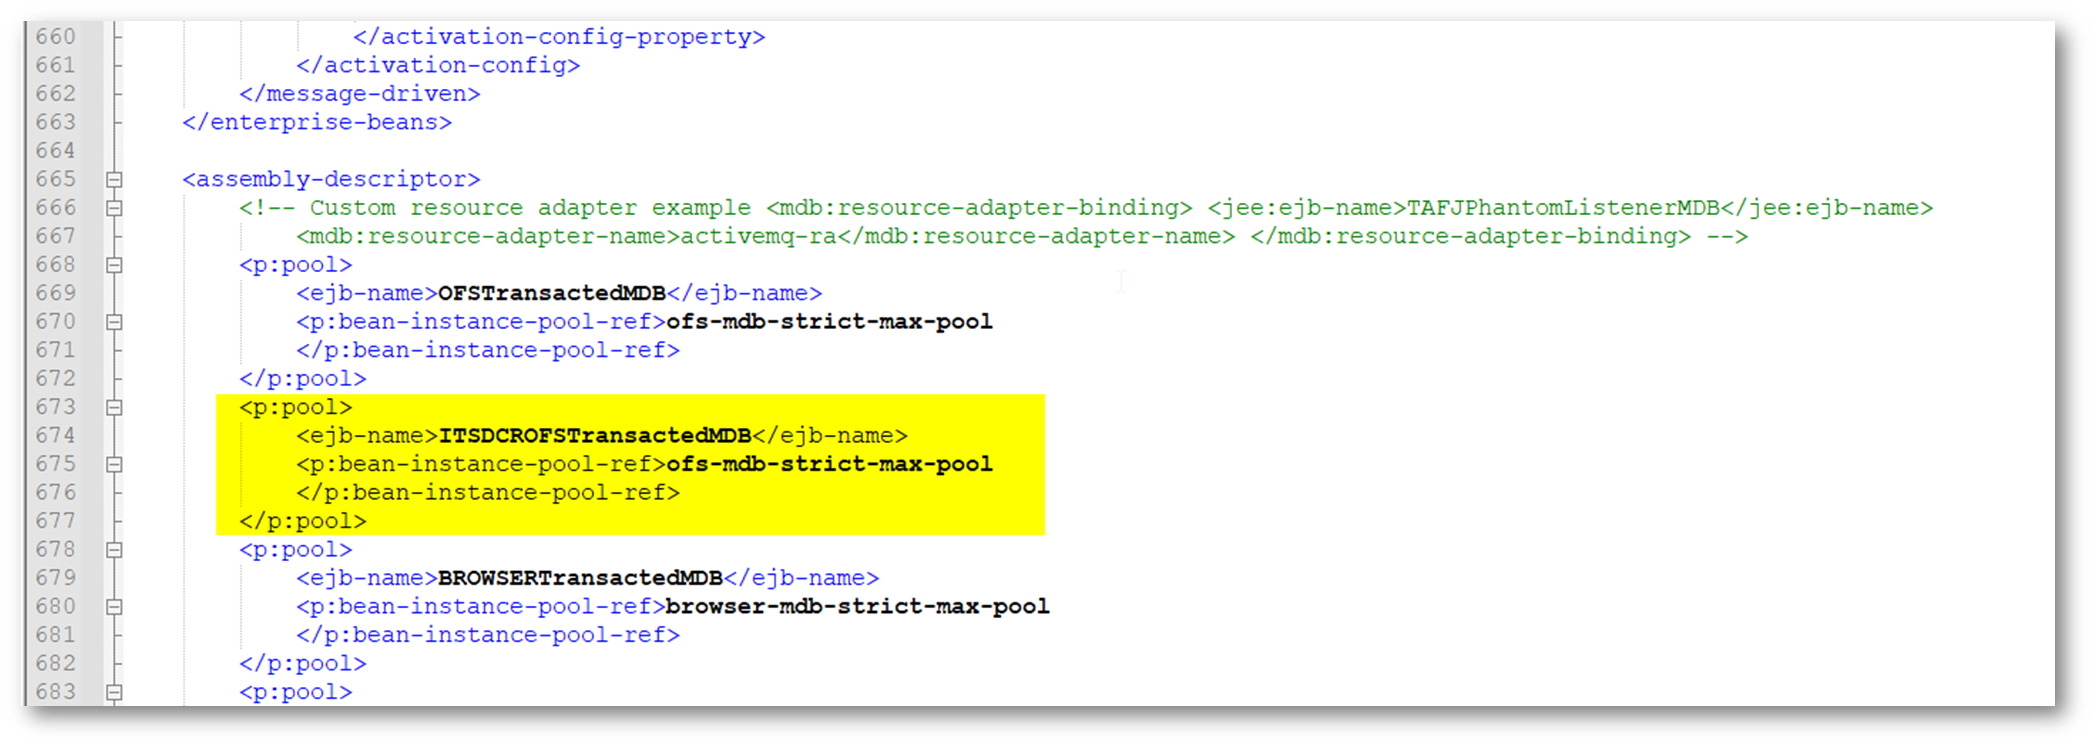
- Add the details below in the <assembly-descriptor> tag.
- Copy and paste the <message-drive> tag and change the highlighted lines below in the ejb-jar.xml file.
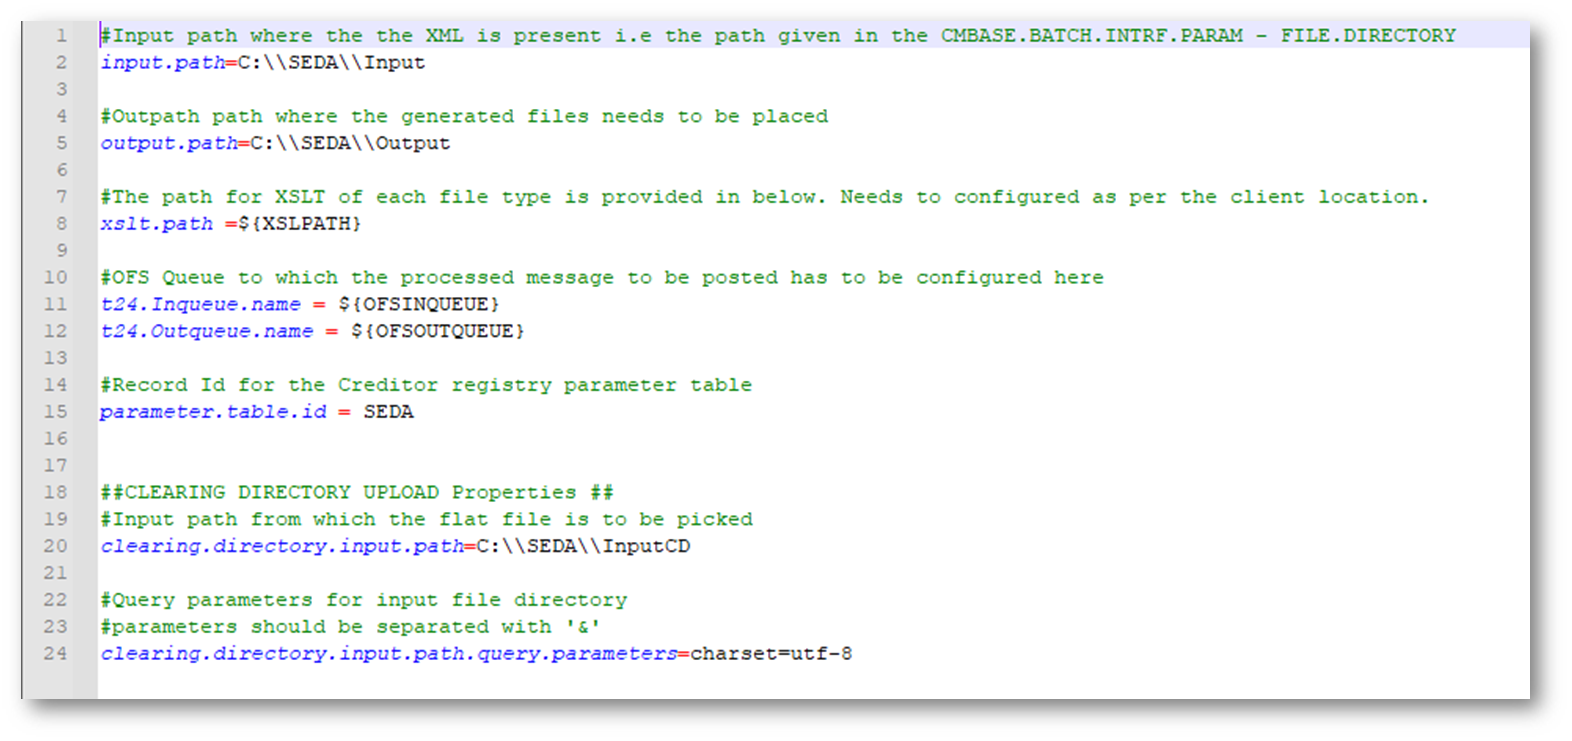
- The content of the Application.properties file is displayed below.:
- Restart the Temenos Transact area.
- Now, start with the package as per the installation steps below.
The Cloud deployment configurations are described below.
- Configure the required configurations in the values.yaml file.

- The MQ Connection configurations are displayed below.

- In the LOGGING_CONFIG path configure the log4j2.xml file location present in the image. It is loaded in the root directory as part of the package.

- Update the values.yaml file for increasing the instance count (By default it is one).

- Mention the range of memory and cores.

- Update the templates/ itsdcr-creditorregistryincoming-deployment.yaml with the image name as required in the sample below.

- Update the templates/ itsdcr-creditorregistryincoming-deployment.yaml file to configure the container instance of mount location.

- The application port is 8080 and is configured in the values.yaml files. The ports provided in values.yaml is referred in the network-policy.yaml, service.yaml and deployment.yaml.
- Load balancer source IP range is referred from sourceIP_ranges in values.yaml files.

- Extract the .zip file.
- In the start.cmd file, set the following details:
- JAVA_HOME variable: points to java JDK location. E.g:C:\java\jdk21\jre.
- PROVIDER variable: contains the queue broker name. It accepts the following values: jboss, ibmmq, activemq, amazonmq, weblogic.
- PORT variable: can be any available port number to be used by the package.
- XSLPATH: path of the XSLT files.
- If the above values are not set, then the following values will be defaulted:
- PROVIDER=jboss.
- PORT=8080.
- XSLPATH=%CD%\xsl\.
- The items below need to be modified in the application.properties.
- input.path.
- output.path.
- t24.inqueue.name.
- t24.outqueue.name.
- parameter.table.id.
- clearing.directory.input.path.
No changes should be done in the xslt.directory.path. - Open the respective application properties for the queue broker type and set the JNDI values. For e.g. if queue broker is jboss, the user needs to open the application-jboss.properties file and set the values.
- In the UserCredentials.xsl from the xsl folder, configure the username/password.
The following steps need to be done for deployment.
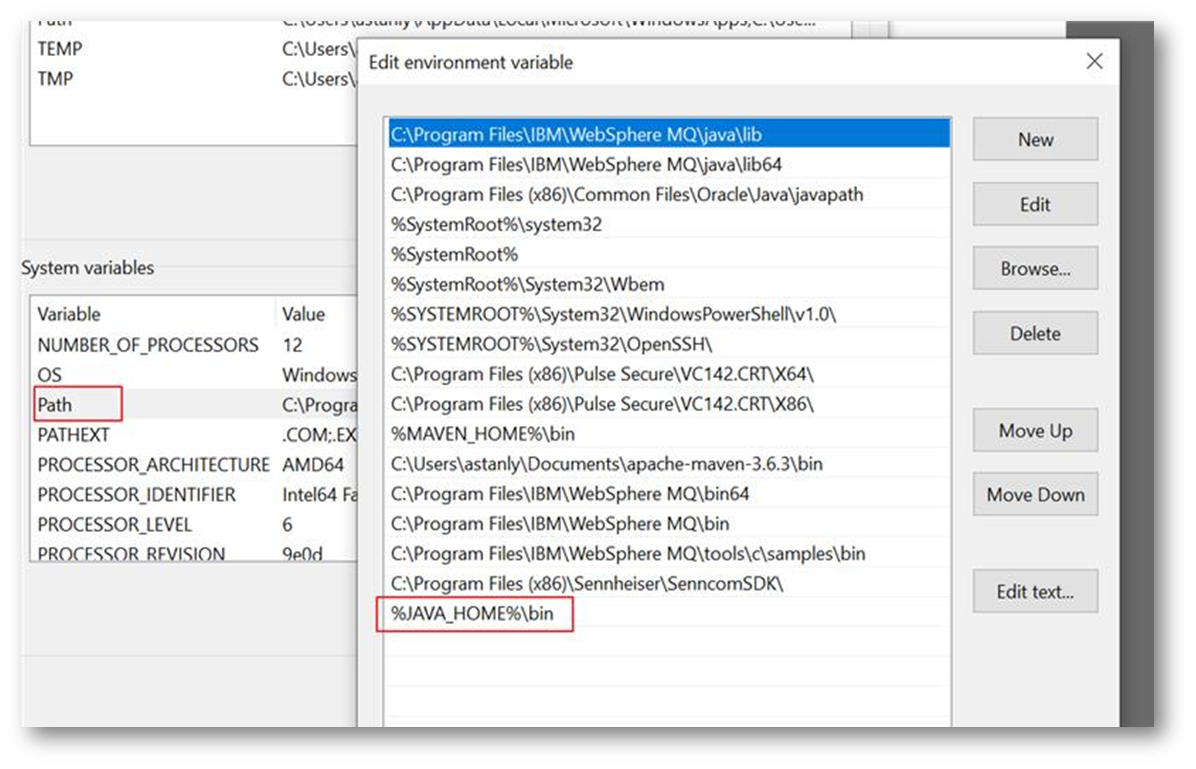
- Configure the environment variables as given below.
- Set JAVA_HOME variable.
- Add the %JAVA_HOME%\bin in the path variable as per the screenshot below.
- Open a command window in the extracted package location, and execute the start.cmd command.
- Syntax:
start.cmd [ -p provider ] [ -po port ] [ -xp xslPath ]
Example:
Start.cmd –p jboss –po 8080 -xp [path]
…\package>start.cmd -p jboss -po 8080
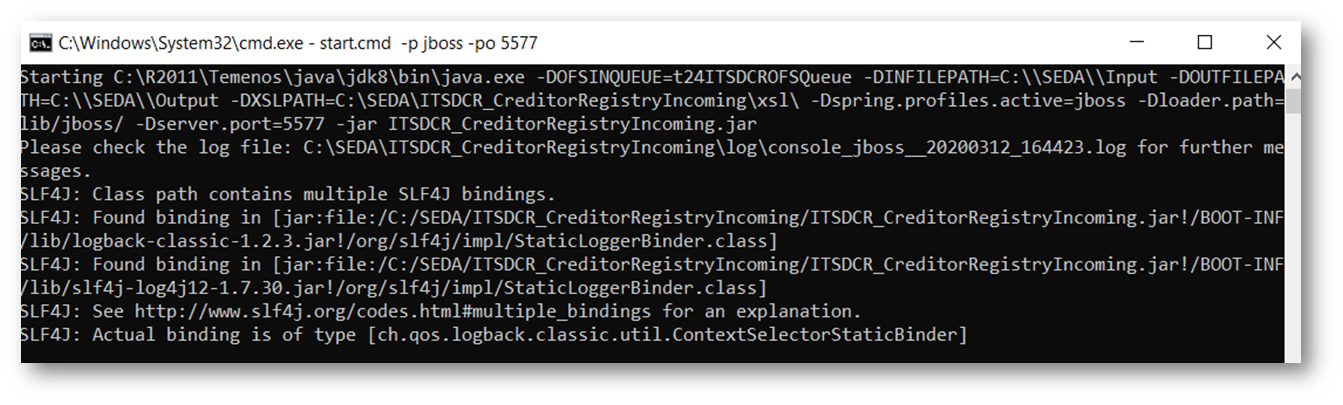
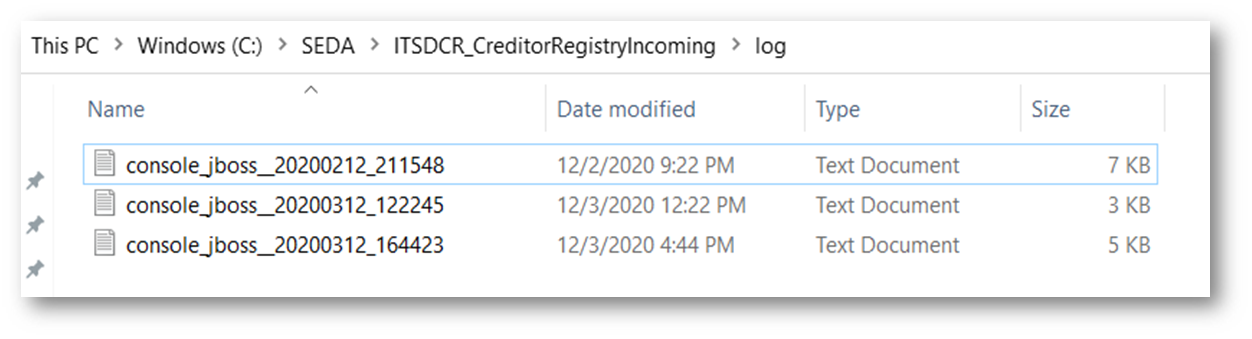
- The logs will generated in the log folder for monitoring purpose.
Example: …\package\log\ console_[providername]_[datetime].txt
The deployment of the Cloud package is described below.
This section explains deployment for Docker Desktop.
- Check if any images are existing (using docker images command) in the destination system. If so remove them using:
- docker images,
- docker rm <image id> command.
- Locate the Dockerfile folder and open command prompt to execute the following command. This will load the images into docker.
Load Images Syntax:
docker build -t <image name>.<tag><location>
Eg:docker build -t itsdcr-creditorregistryincoming:dev.

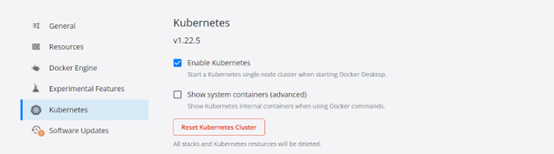
- Start Kubernetes, in this example it used Kubernetes provided by Docker desktop.
- Start a local docker registry server using docker image that will be used as a container registry hosting all the equens-signature images deployment.
Start Local Registry Eg:docker run -d -p 5000:5000 --restart=always --name registry registry:2
- Once the registry is started, it needs to tag and push the images that were loaded earlier.
- Syntax and samples for tag and push is mentioned below.
Docker tag images Syntax:
docker tag <Repository> <local registry host>:<local registry port>/<repository>:<tag>
where,
Repository – itsdcr-creditorregistryincoming
local registry host – localhost
local registry port – 5000
tag – dev
Eg: docker tag itsdcr-creditorregistryincoming:dev localhost:5000/ itsdcr-creditorregistryincoming:dev
Docker push images Syntax:
docker push <local registry port>/<repository>:<tag>
Eg: docker push localhost:5000/ itsdcr-creditorregistryincoming:dev

- Navigate to helm folder and start services using below command.
Start services Syntax:
helm install -name <<image name>> . -n <<image namespace>> --create- namespace
Eg: helm install -name itsdcr-creditorregistryincoming . -n itsdcr-creditorregistryincoming --create-namespace

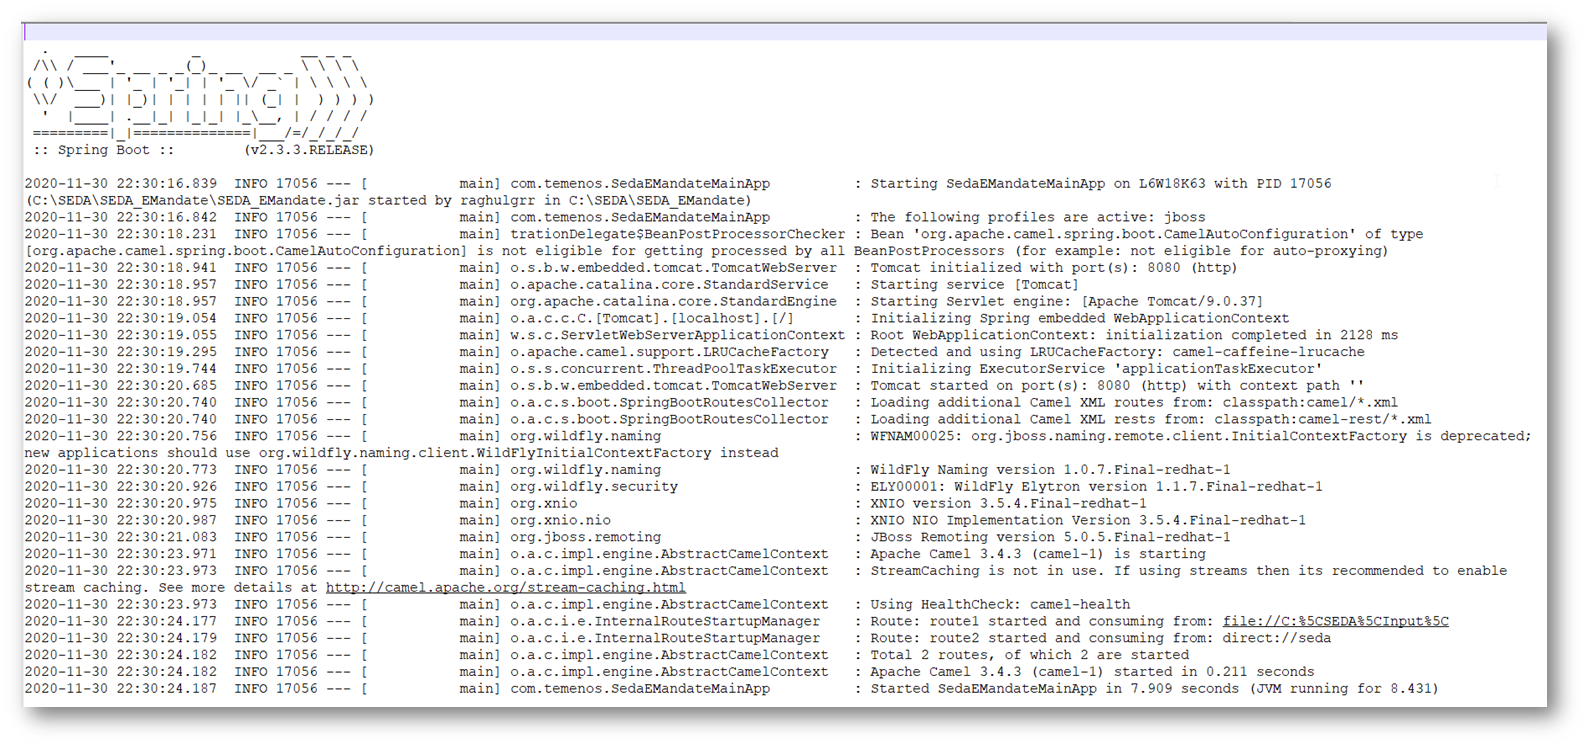
- If the application is running, POD log will be generated with the keyword 'ACCEPTING_TRAFFIC'.
- To uninstall the service use the below command:
helm uninstall <<image name>> -n <<namespace name>>
Eg: helm uninstall itsdcr-creditorregistryincoming -n itsdcr-creditorregistryincoming
- Go to the part where the zip file is extracted.
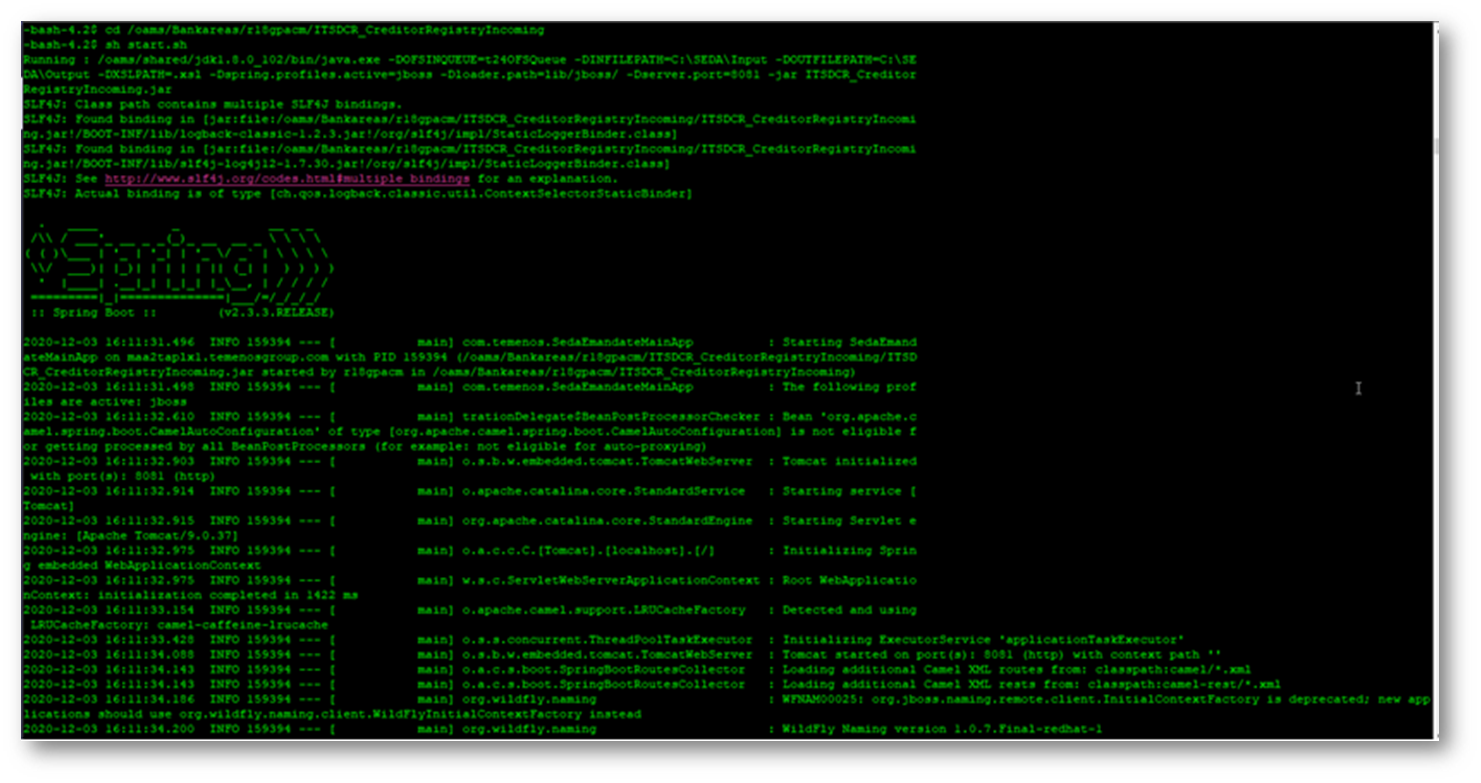
- Launch the shell using the sh start.sh command.
Configure the System
Create a parameter record in CA.CLEARING.DIRECTORY.PARAM with the record Id as “SEDA” with the following fields.

In this topic